Assess your kids ability: What length of track and what elevation should I choose?
I find with my kids (4,7,8) that about 3-4 hours to be a great length of track. Then I usually add on time for lunch and rest.
If it’s your first hike with school aged kids, then perhaps 2-3 hours is a good start, depending on their age. Only you will know the ability of your children and what my kids can do as experienced little hikers, may not apply to you.
Here are a few tips when you are looking at length and elevation
- A short track does not necessarily mean that it will be easier because it’s shorter. You will need to consider the elevation too to get a gauge on what the track will be like. (see more below)
- Most adults will walk at about 5-6 km per hour on the complete flat around town. But I have found that 2-3 km an hour to be a good estimation of kids with a few hills.
- Read up on blogs about the trails, or google “x track with kids” to see if someone has done it already with kids. Bloggers generally go into a ton of detail and provide lots of photos to give you an idea of what the track is actually like.
So what am I looking for in elevation?
Well, Mt Victoria in Wellington (a pretty well known hill) is 197m in elevation. This shows how high the mountain is above sea level.
Elevation gain is similar but not exactly the same. Elevation gain is how many metres up you go, on the trail. For example if your track goes up high, down low, then up high again, you may have walked “up” a lot more metres than just the height of the mountain.
In general, if you are climbing up one hill/mountain, then these numbers are likely to be similar. If you are doing a longer track that goes up and down a lot of hills, then you will have more uphill than just the height of the tallest hill on your track.
So how much elevation is too much? What should I be looking for?
Here are a few examples of popular tracks that may give you a small gauge. After this, I would try some out, and then you can determine what is about right, or what is too much for your family
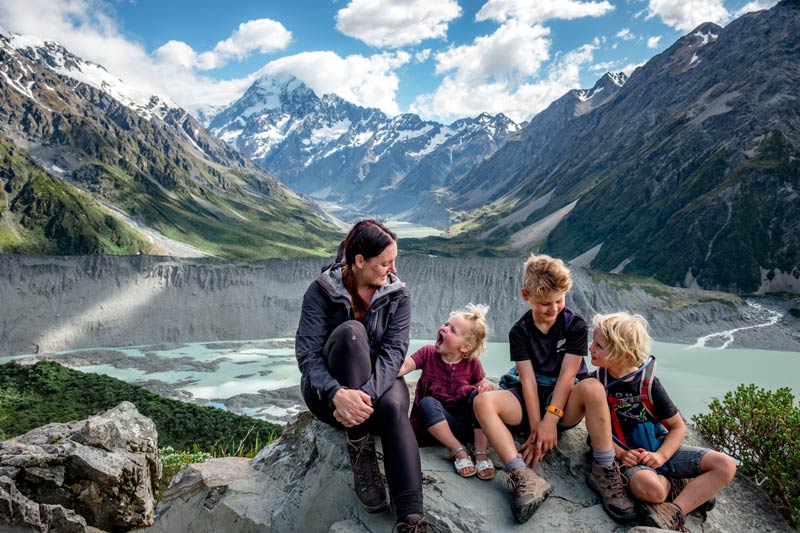
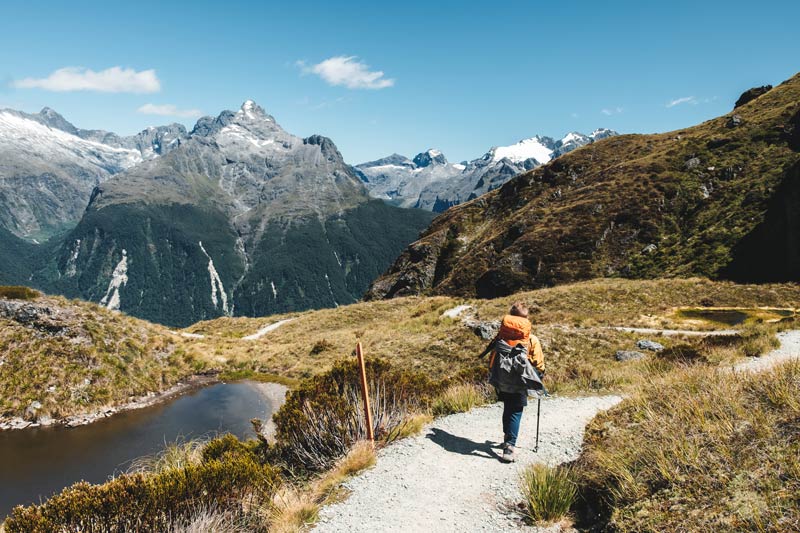
- Sealy Tarns Track in Mt Cook National Park. (pictured below) This has an elevation gain of about 600m and is about 3 km long. Given that the track isn’t very long and this is quite a bit of elevation, you know that this track is going to be steep. In fact this track has 2200 stairs and is practically a stair walk to the top. It is recommended to take 3-5 hours return so is quite a “lung burner”.
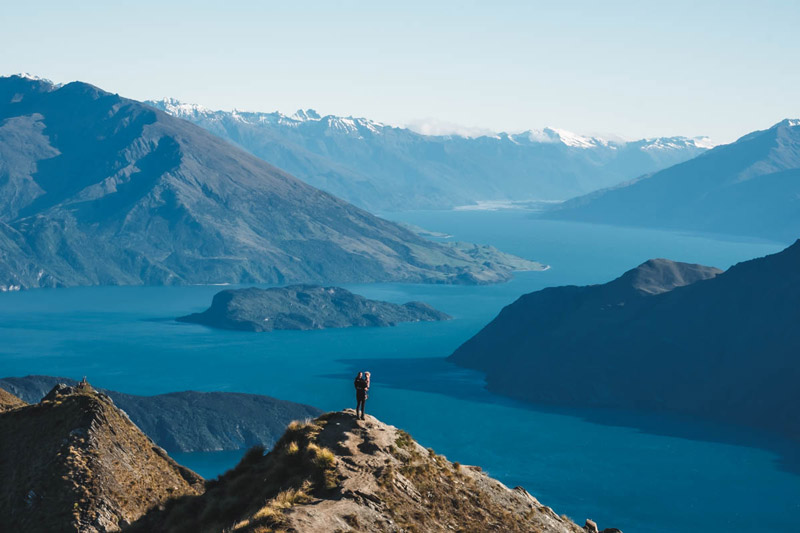
- Roys Peak, Wanaka: That amazing Instagram viewpoint that you’ve probably seen everywhere. This track is about 8 km each way and has an elevation gain of about 1200m. It is a long uphill slog on a 4wd style track. It’s pretty steep but not as steep as the Sealy Tarns above that it needed stairs. A steep 8 km uphill track will generally take us 3-4 hours. This track also has no available water or shelter from the sun, so on a hot, sunny day the climb can feel even more strenuous.
- Mt John Walkway, Tekapo: This is the big hill at Lake Tekapo that has the observatory on top. This has about 350m of elevation over a couple of kilometres. It takes about 40-60 minutes to reach the top.
If you are just climbing one hill, then 200-300m will feel like a good climb. You will definitely know that you’ve done some good uphill, but it will be doable. If your kids are strong, fit or older, then you could definitely test them out more.
For us as an experienced family, 600m is a good mid range hike for us and anything over 1000m is definitely a full day slog.
Hopefully that will help to give you a bit of a gauge. It’s definitely something that I’ve only figured out by doing lots and now I have a lot of trails in my head to compare the experiences too.
Warning: When a DOC track says it’s easy, this doesn’t mean it’s necessarily physically easy
I once took a DOC track that said easy, which I thought would be great carrying a baby in a front pack and found myself using chains to pull myself up and a huge uphill slog.
So here is a little word of warning. Sometimes the difficulty actually relates to what type of terrain and trail the track is, rather than if it’s hard or easy fitness wise. Thinking gosh? What does that mean for me?
Easy often refers to a well marked path that is easy to follow. You are very unlikely to get lost (i.e. no navigation skills required) and it is easy to tramp. This does not mean there won’t be big hills, nor does it mean the track will be flat. There are plenty of “easy” DOC tracks that have had me with burning lungs, so this is a little word of warning.
I would say that these “easy” tracks are not too hard for people with average to good fitness and people who have hiked a bit. So if you are an outright beginner, don’t be put off at all by this, your fitness will build fast. But I just don’t want you to expect a complete Sunday stroll that you could do in your jandals.
To get a more accurate expectation of a walk, you can read the track descriptions on Plan My Walk. They also have a review feature so you can see what others have said about the track.(
Check the Weather: Super important!
Oooh the weather is such an important factor when tramping. It’s not that you can’t tramp in some bad weather, but you just have to be prepared.
One thing you must note is that New Zealand’s weather is very volatile. It changes so quickly that you can be hot in sunshine one minute, and needing a puffer jacket the next. This is particularly true in the outdoors and in alpine environments.
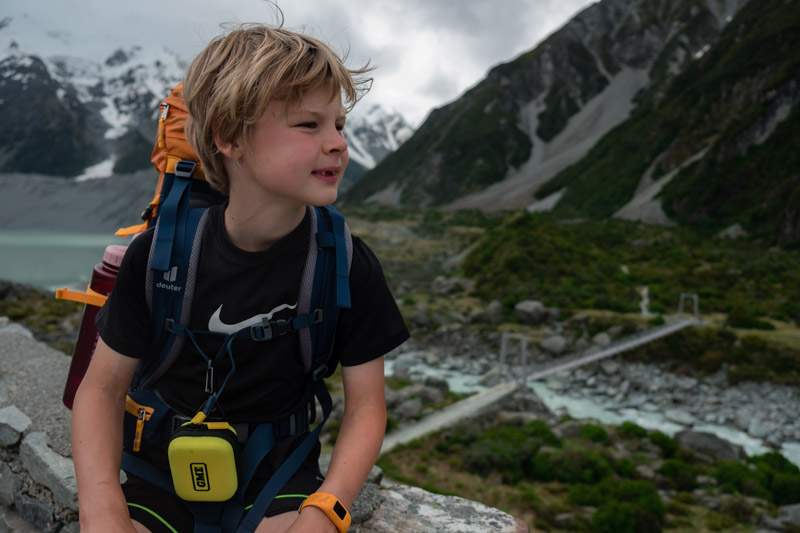
It’s worth nothing that even if a place seems relatively flat, it may be far above sea level. For example, Mt Cook Village in the South Island seems relatively flat driving in, but is in fact 750m above sea level. This means just a small hike puts you at 1000m above sea level. Similarly in the North Island, the township of Ohakune is already 590m above sea level.
In general, the higher up you go, the more extreme and changeable the temperatures are. At 1000m above sea level, I have been in 16C and sunshine and 10 minutes later, it was 10C, fully clouded in and windy and no visibility. Not that fun coming down a rocky steep mountain and barely seeing 5m in front of you.
Checking the weather beforehand means you know what to expect, know what to pack to deal with everything that could occur, and in the case when it looks really rough you’ll know to look elsewhere for a walking option, and save this particular track for another time.
What can you use to check the weather?
- We start with the Plan My Walk app. The app has built in weather information provided by the Metservice. You can choose your track, click on weather and it will provide local weather advice for your trail area. The app also has weather alerts should things be looking particularly nasty.
Then we check a few other sources to triangulate our information.
- YR.no – This is a Norwegian website and one thing that I like is that you can view the conditions hourly and take a look at predicted rainfall per hour and wind. Sometimes a generic weather app will say rainy in the afternoon, but you might find its only 1mm predicted late in the day. Or you might see it’s rainy in the morning and think that’s fine, but find out it’s 40mm of rain per hour for three hours (heads up – that’s a lot!) I often will check a few locations such as Mt Cook Village, as well as Mueller Hut if we were heading there, and look at the change in temperatures and compare rain and wind. This just gives me an idea about what to expect.
- Windy.com – This website has a good wide view to show you the fronts, just like the weather on the news. You can see what direction the wind and rain is coming and whether it is supposed to last a long time
- Webcams: If you are hoping to drive somewhere for great views, check the webcam and see what the weather is like. Great for spots on the West Coast if you want to see the glaciers, or places like the Ashburton Lakes that has its own little microclimate, even just an hour from Ashburton (where the weather can be so different)
What to pack on a family tramp?
Too many things and your pack is too heavy, not enough things and it could be dangerous. I know these decisions are hard to make, but fortunately the Plan My Walk app has all this information detailed for each individual trail.
All you have to do is choose your track and click “gear”. It will include the clothing, equipment and food that you will need for this track. What I really like is you can tick off the checklist of items, as well as add your own. I often forget things like insect repellent, so I can add this specifically to my packing list.
Do I need to carry a personal locator beacon?
Before I started really getting into hiking, I thought this was an overkill. I mean, I wasn’t tramping in the back country for days.
But someone once asked me, while I was tramping with three young kids by myself…. What would happen if you hurt yourself and couldn’t walk out? Or I see you are carrying your littlest one, what if one of your older boys hurt themselves and couldn’t walk.
See, the problem with being out of cellphone reception and often in places where there aren’t others just strolling past, is that I would be on my own. The only way to get out would be to walk out.
My kids are too young to just leave them there, sitting until I run out and get help for them. Or worse… could I just send my 8 year old back down the trail to hopefully get reception and get help if I injure myself.
None of these seem like reasonable answers in an emergency situation
So now I carry a personal locator beacon, always. It always lives in my hiking pack at home and should be worn on the outside of your pack, like attached to the chest clip, so you can reach it if you fall or hurt yourself.
Your children should also know how to use the PLB if they are old enough too, and know when the right time is to do that. Our kids know that if something happens to Mum and she is too hurt and won’t wake up, that they are to use the beacon. They know how to keep warm, find shelter, potentially ration food etc. We’ve had some great scenarios that we’ve chatted through and I am pretty confident they would be ok
Personal Locator Beacons start from about $450+ depending on the capability you need. These are a basic “push the button and help will come” style device. Others called Satellite Messengers let you message via satellite to contact friends or family, which is handy to let people know that you will be late, though you do need a subscription. They often have an ‘SOS’ type function as well, but it’s important to know the differences. The Mountain Safety Council made a short video outlining the considerations before you spend, you can check it out here.
One benefit of those satellite messengers is that in the instance that you have rolled an ankle and it is taking you a long time to make it back to the car, its great to let someone know you will be late, and that you’re not lost or dead, just slow.
You can hire Personal Locator Beacons and I highly recommend this for tracks where you are out of cellphone reception. Local outdoor stores, some service stations and Macpac all hire these out for around $20 a day.
Otherwise I would make sure you take a number of adults if you are heading out with a group. This would help you if you were injured, as you could send another adult to go call for help. However, if you got lost, or if you’re on a multi day walk and far from help, you’d still be in trouble, so always take a PLB just in case.
Our family hiking rules
I say “rules” rather loosely as it’s not meant to restrict the fun, but there are some firm guidelines we abide by when we are walking. We also teach our “family rules” to other families who join us. A bit like your “house rules” on a game of cards.
You will have your ideas, but here is what we do
- Never pass a sign, cross a bridge or river, or any “landmark” without waiting for the group
- You should always be able to see or hear the group.
- On more simple trails, or ones we know well, we allocate a meeting point so the kids can walk ahead a little.
- Always use the toilet.
A few other tramping tips that work for our family
- Leaders: Our kids are always getting mad at each other if they get passed or are not in front. We divide up leader time into perhaps 20 minute slots, or to a certain point. They get to be in the front and the others must stay behind them. The leader is also responsible for checking on the group and making sure everyone catches up.
- Snacks: If your kids just want to stop and snack all day, have a “snack leader” and allocate them 2 breaks before lunch. The snack leader can choose where and when they stop but there’s only 2 (for example)
- We play the “marker” game. Spot the orange marker up ahead and get a point for your team. This works well with parents vs kids, and as a parent at the back I always lose. They quite like that.
- There are some tracks with a marker every kilometre. Think up a fun activity to do at each one, like a dance party, Dad has to tell a joke, change the leader etc.
Wow that is a lot of information, so if you’ve made it this far, I applaud you. The good thing is that the most important safety advice can be found on the Plan My Walk app, so you can have this info at your fingertips with the click of a button.
Download the app today
Happy walking and stay safe!