Kepler Track
The Kepler Track, New Zealand Great Walk:
Whoa this was epic!
Off the bat I’m going to say that this track was long. Most days were 16-18km but they were pretty awesome. Incredible lake views, mountain vistas, the greenest bush you’ve ever seen, native birds and a whole group of people just keen to experience the best of New Zealand. That’s quite a combo right?
The Kepler Track in Fiordland National Park is a 4 day, 3 night hike over about 60km. It is one of the New Zealand Great Walks, which means firstly it’s a pretty popular and special trail and secondly, it’s a highly serviced trail.
The Department of Conservation are resourced to ensure the tracks are top notch and you get some added extras such as gas cookers and gas included in the huts and even flushing toilets. During the summer/peak months they also have hut wardens on site to look after the hut and give you all the info that you need.
It’s a big walk and requires quite a bit of planning and even booking the Kepler Track can be tough, so I’m going to give you some epic tips for the Kepler Track.
What you’ll get in this article
A detailed rundown of how to plan, pack and what it’s actually like to walk the Kepler Track with kids. Even if you don’t have kids, it should give you a good feeling of what it’s really like. Parents, I’ll add in anything helpful I can think of, specifically for kids
Table of Contents
- Kepler Track and Fiordland: About the region
- Where to stay before and after the track
- When is the best time to walk the Kepler Track?
- Kepler Track Booking: How to get a Kepler Track hut booking and costs of the Kepler Track huts
- Kepler Track Weather
- Kepler Track FAQs
- Kepler Track Map
- A day by day account of the Kepler Track with photos
- What food to pack on the Kepler Track
- What gear and clothing to pack for the Kepler Track
Where is the Kepler Track? Welcome to Fiordland
The Kepler Track is located in the beautiful South Island town of Te Anau, the heart of Fiordland. It’s about a 2 hour drive from Queenstown and Invercargill which are the closest airports.
The Kepler Track starts just 5km from Te Anau township and is a full loop track (although you can shorter this a bit with Kepler track transport, discussed further in our article below)
There are 3 Great Walks in Fiordland: The Milford Track, Routeburn Track and Kepler Track. We met so many people doing 2 of these while they were in the area, so you
The Fiordland region is green, lush and untouched. In fact the majority of it cannot be accessed by road. Boat, helicopter and sea plane are the best ways to really explore the beauty of Fiordland.
While you are in the region, you must take a trip to Milford Sound. Fiordlands biggest tourist attraction can be found 1.5-2 hours from Te Anau on the most mystical road into what feels like the middle of nowhere.
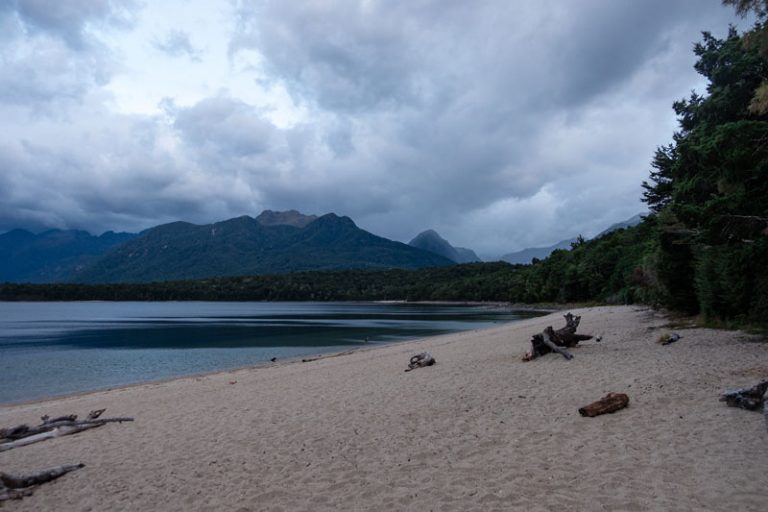
Waterfalls pouring down the mountains, misty mountains and a huge fiord that is Milford Sound is a must do on your list. Or head to beautiful Lake Manapouri (more pretty than Te Anau in my opinion) and take a day trip to Doubtful Sound. Its a full day of boat – bus – boat to reach this remote sound, but you can bask in the knowledge that very few ever get to experience this bliss.
For more info on this region, check out these articles below
- Te Anau Walks
- The best things to do in Te Anau
- Milford Sound vs Doubtful Sound (which boat cruise is better)
- The stunning Lake Marian hike
Where to stay for the Kepler Track?
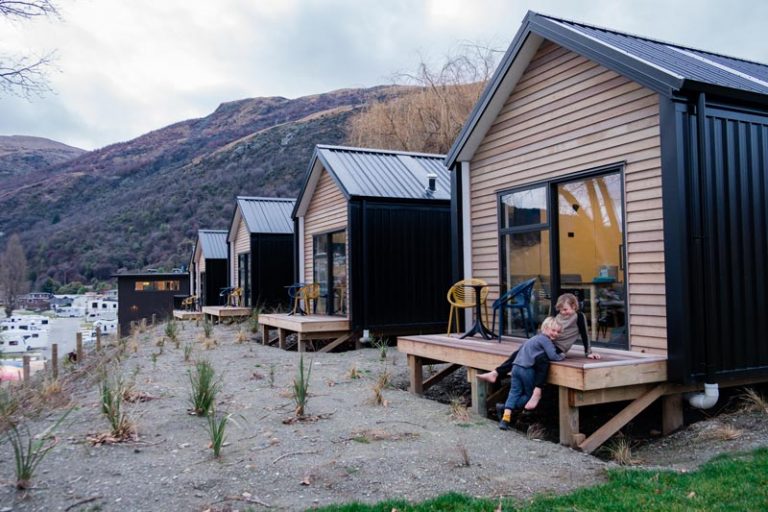
We stayed at the Driftaway Queenstown prior to walking the Kepler. On Day 1 of our hike we just drove the 2 hours to the trailhead and were good to go. We were hiking by about 8.30am and it was just perfect.
We did all our prep for our hike in the Driftaway so was thankful to have kitchen access and a full fridge in our room. We baked up a bacon and egg pie and kept all our chilled products cold for the first day to keep everything as fresh as possible. It was the ideal starting spot.
If you do stay at the Driftaway, use the code “backyard” for 20% rooms and campsites.

If you do wish to stay in Te Anau pre or post hike, here are some places that we recommend.
Marakura Motels, Te Anau
The Marakura Motels are a great family friendly accommodation option in Te Anau. They have lovely spacious 2 bedroom apartment style hotel rooms and we really appeciated having 3 single beds for our larger family rather than the kids having to share. They can also sleep more on a sleep sofa in the lounge too if you have more kids than we do.
It’s a great place to prepare or recover, as it has a full kitchen so you can even do some cooking or baking before you leave. Lovely lakefront views make it such a relaxing spot
When is the best time to walk the Kepler Track?
The best time to walk the Kepler Track is during the Great Walk season which is late October – 30 April. This time of year usually has the best weather and is less likely to be affected by avalanches on the alpine section.
Tips to book a New Zealand Great Walk Hut
It is not difficult to book the Kepler Track, the hard bit is actually securing a booking. Since 2020, the Kepler bookings have been pretty crazy with this New Zealand Great Walk selling out in around an hour.
I know, that sounds super stressful, but here are a few things you can do to get a spot.
- Have your ideal dates and some back up dates just in case. If you are going with a group, sort out all these details prior to booking day.
- The busiest times are likely to be during public holidays and New Zealand school holidays (late Dec-early Feb and Easter school holidays) If you can do a midweek trip outside of these times, you’re more likely to get a spot.
- Decide the direction you will be walking and whether you will use huts or campsites. I recommend walking anticlockwise, starting with Luxmore Hut
- Keep an eye on the DOC website where they will release the NZ Great Walk booking dates. Over the last few years, they’ve released 2 Great Walks each day for a week. In 2022, they released the hut in early May.
- Make sure you sign up for a DOC Great Walk booking account prior to booking day. This (annoyingly) is a different login to normal hut and campsite bookings.
- Set your alarm.
Last year, I got the dates I wanted first off. The year before, I went in and it looked like everything was booked. About 15-30 minutes later, I came back in and there were lots of dates to spare. I imagine there may have been members of the same group trying to secure a spot, and some cancelled once their friends nabbed on. So don’t despair.
You can also come back later on during the season as if people are sick or injured, then spots do pop up. This is more likely for smaller groups mind you, but keep checking in every now and then. Plans do change and you might be able to pick up something last minute.
How much does it cost to book the Kepler Track?
The Kepler Track walk is absolutely free. There are no costs to enter our national parks or walk on public trails. Woohoo!
BUT, you will need to pay for the huts or campsites you stay at along the way. These need to be booked online in advance. You can make bookings on the Department of Conservation (DOC) website.
There are different prices for on peak and off peak seasons. It is only recommended you walk the trail during peak season as the weather risk is much lower. The track is prone to avalanches during the winter so you should only attempt winter/spring trekking if you have the appropriate skills and equipment (ice picks, crampons, avalanche probe etc)
Great Walk Season for the Kepler Track is late October – 30 April.
Cost for Kepler Track Huts as at 2022
Summer Prices/Great Walk season prices
- New Zealand Resident: $68 per adult per night. $0 for kids under 18
- International Visitor: $102 per adult per night. $51 per child per night.
Winter Prices (July/August)
- All adults $15 per night
- All kids: Free
Shoulder Prices (May/June)
- All adults: $25 per night for Luxmore Hut and $15 for the other huts
- All kids: Free
Shoulder Prices (September)
- All adults $15 per night
- All kids: Free
Costs of camping on the Kepler Track
Camping is much harder on the Kepler Track as there are only two campsites. There is a campsite at Brod Bay and one at Iris Burn Hut. This does mean that the hike from Brod Bay to Iris Burn will be 8km to Luxmore Hut, then a full 16km or so to the next site. That would be a tough and long day, but for fit individuals I’m sure it’s a good challenge. Just something to note.
Summer Prices for camping on the Kepler Track (late October – end of April)
- New Zealand Resident: $21 per adult per night. $0 for kids under 18
- International Visitor: $32 per adult per night. $16 per child per night.
Winter and all other times
- $5 for adults and free for kids under 18
Kepler Track Weather
Look, I’m going to be completely honest here and say, that if you’re booking the full Kepler Track during Great Walk season (late October – April), it doesn’t matter the weather.
Wait, wait – hear me out. Bookings go pretty quickly so once you nab a date that works, thats it.. You’ve got no say in the matter. It’s not like you can really postpone your trip a few days to avoid the bad weather.
Weather in Fiordland, like anywhere in New Zealand, is extremely changeable. If you’re from New Zealand, you’ll already know it can be four seasons in one day. If you’re from overseas, welcome and now you know.
You are going to have to pack for all weather. In the middle of summer, in practically perfect conditions, I wore a singlet, I wore my puffer jacket and raincoat, I had my beanie on and off and contemplated putting on gloves.
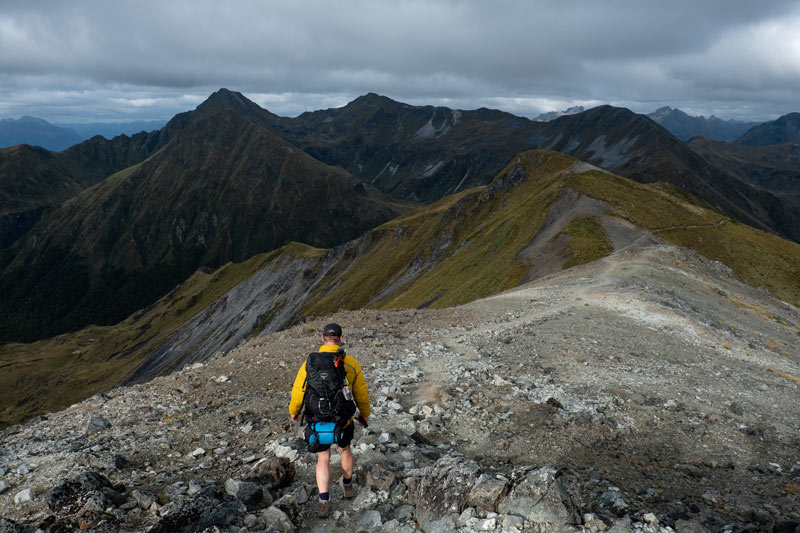
You will need to pack for cold alpine conditions as at the end of day 1, you will be over 1000m and day 2 is an alpine walk with the Kepler track elevation hitting over 1400m. What this means, is way up there, the weather changes fast. It can get cold really quickly and the winds whip over the mountains.
Yet at night, in a hut with 50 people, it was hot.
So here is my advice for packing and dealing with weather on the Kepler Track. You will need to pack everything no matter the weather, however keep an eye on the forecast about a week out and keep watching it. If it’s multiple days of rain, pack some extra walking clothes and a dry thermal, but besides that, the weather is, what it is. There’s no such thing as bad weather, just bad clothing.
*** If the weather during this time is unsafe, DOC wardens will not let you continue onto the next hut. You may have to wait out the weather. So obviously weather is a factor, but in your initial planning, you just have to hope for the best and pack well.
Walking the Kepler Track out of Great Walk Season (May – late October)
The Department of Conservation recommends only walking the track during Great Walk season unless you have alpine experience.
During winter and spring, it snows in the alpine section. Even in the middle of summer, this day was quite cold for some time, so I can only imagine what its like when the temperature drops and wind blows.
If you wish to do a day walk on the track, perhaps to Luxmore Hut, or attempt the full circuit in the shoulder seasons, this could be possible, but I would strongly advise giving the Fiordland National Park Visitor Centre in Te Anau a call. They will know what the conditions are like and you can then assess if you have the skills to do it.
But if you’re hiking with kids, just be safe and do it during Great Walk season.
For more information on keeping safe in the New Zealand outdoors, take a look at the NZ Mountain Safety website which has a whole pile of useful outdoor resources specific to New Zealand terrain and weather
Quick Fire: Kepler Track FAQs
Lets answer a few quick fire questions, before we delve into the day to day details of the walk.
How difficult is the Kepler Track?
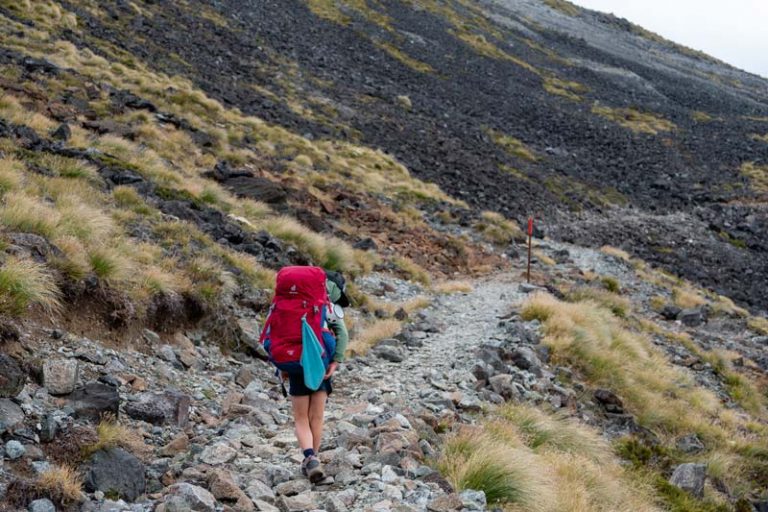
Fitness wise, I’d say it’s a moderate hike in terms of uphill, but with a heavy pack and long 16km days, that does make it harder. You’ll need to be able to do 6-8 hours walking and being on your feet including hills. If it’s your first multi day walk, there are easier ones to start with.
Our experience: We have decent fitness and plenty of tramping experience so we actually found the trail pretty easy. The only thing that made it hard was the time on your feet and carrying a heavy pack (thanks kids). If you are used to hills, its not particularly steep and we have definitely climbed harder ones, but more with a day pack.
The Kepler Track would become considerably more difficult in adverse weather, so this is something to keep in mind. We walked this track in practically perfect conditions.
How long does it take to walk the Kepler Track?
The standard time to walk the Kepler Track is 4 days and 3 nights. Allow about 6 hours per day for walking.
Can you walk to Kepler Track in 3 days?
You could, yes. You could skip the last hut and walk out to Rainbow Reach. This would mean your last day is around 22-23km.
How much is the Kepler Track?
It doesn’t cost to walk the Kepler Track itself, but if you wish to stay at the huts or campsites along the way, then you must book these. We booked in 2022 and it was $68 per adult for New Zealand residents, with under 18s free. International Prices were $102 for adults and $51 for youth. It is cheaper out of great walk season but you’ll likely need advanced tramping skills for this.
Can you camp on the Kepler Track?
Yes at Brod Bay and at Iris Burn Hut. The Brod Bay campsite and Iris Burn campsites are both available to book online
How many huts are on the Kepler Track?
There are three huts on the Kepler Track. Luxmore Hut, Iris Burn Hut and Moturau Hut
Where does the Kepler Track start and end?
The Kepler Track is a loop track that starts and ends at the Kepler Car Park at the Control Gates. You can shorten this journey by taking a water taxi to Brod Bay (saving 6kms) and having a Kepler Track shuttle pick you up at Rainbow Reach (saving 9.5kms)
But you can park at the Kepler car park and have no requirement for any other transport.
What is the best way to walk the Kepler Track?
The Kepler Track can be walked in either direction but it would be easier to walk anticlockwise from Luxmore Hut to Iris Burn Hut to Moturau Hut.
Are there toilets on the Kepler Track?
Yes there are flushing toilets at the Great Walk huts and there are long drop toilets at a number of the shelters along the way.
Are there showers on the Kepler Track?
No, there are no showers on the Kepler Track. You can take a dip in the river at Iris Burn Hut or Lake Manapouri at Moturau Hut to refresh yourself. Please do not use soap, shampoo or any products in the water sources. These are sources for surrounding animals and plants.
Is there drinking water on the Kepler Track?
Yes there is drinking water at the Kepler Huts. It is generally advised that you boil/fitler this water as the water is not tested. There are a few rivers along the way where you could also fill up. The flow of these, though, would depend on rain.
Can you swim on the Kepler Track?
Yes you can swim at Iris Burn Hut in the river or Iris Burn Waterfall, or at Moturau Hut in Lake Manapouri.
Are there Kepler Track guided walks?
Yes you definitely can. This is great for those with limited tramping experience, people who would love to learn more about local history, flora and fauna, or those wishing to experience a Kepler Track day walk as opposed to the full 3-4 day hike
Local company Trips and Tramps offers a fully guided Kepler Track package as well as a really cool option to flying up to Luxmore Hut, hiking the Mt Luxmore Summit, then heading back downhill to Lake Te Anau.
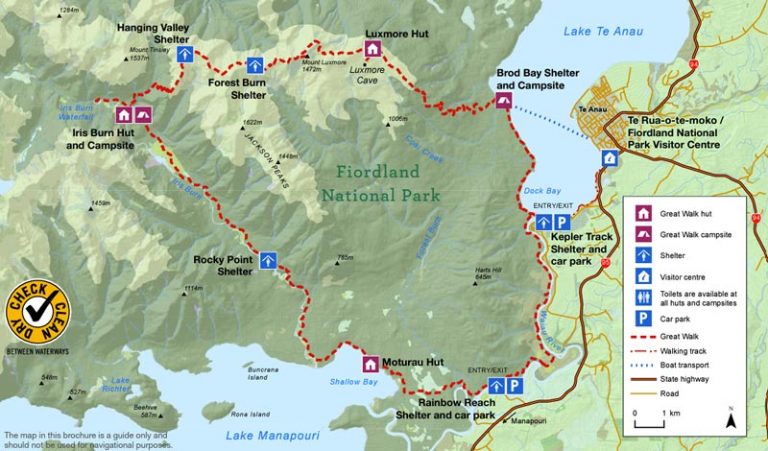
DOC Kepler Track Map (above)
The Kepler Track in Fiordland National Park is an incredible New Zealand Great Walk. The one thing to note about this walk is that it is really long. At more than 60km over 4 days, thats a lot of long days on your feet. I mean, I can walk 16-18km, but multiple days of it did give me sore feet.
If thats a bit of a dealbreaker for you, the Routeburn Track nearby is 32km over 3 days, so a day less, but only half the distance and its amazing too.
I need to premise our account of the track by saying that we walked in practically perfect conditions. The tracks were dry, the winds weren’t too strong and we had a fab time. Day 2 of the track would have been a completely different experience if we spent 12km in the alpine section in the howling wind and whipping rain with kids.
Day by Day
Day 1: The Kepler Control Gates to Luxmore Hut: 13.8km
DOC Recommended Time: 5-6 hours
Backyard Travel Family Time: 5 hours 50 minutes including all stops for lunch, snacks and photos. My garmin clocked 14.85 km.
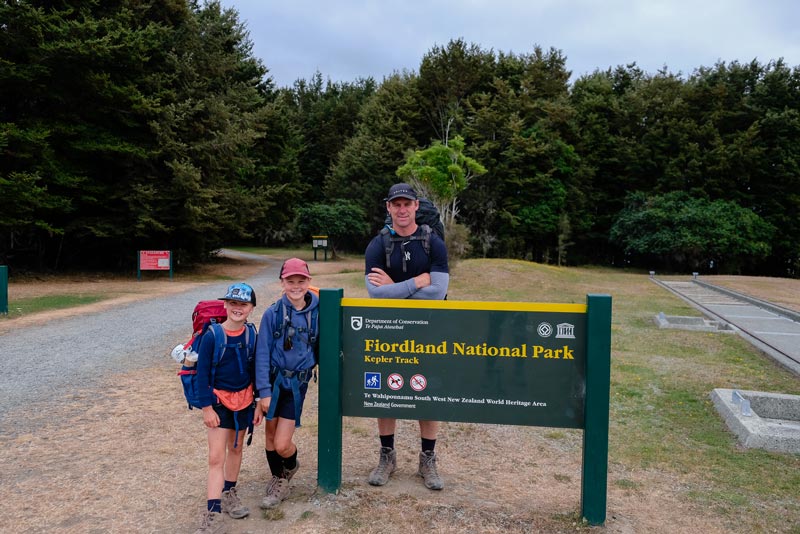
The start of the trek, with emotions running high and everyone so excited – the first day was such a good start. The official start of the track is just across the Kepler Control Gates, just a few minutes walk from the Kepler Track Carpark.
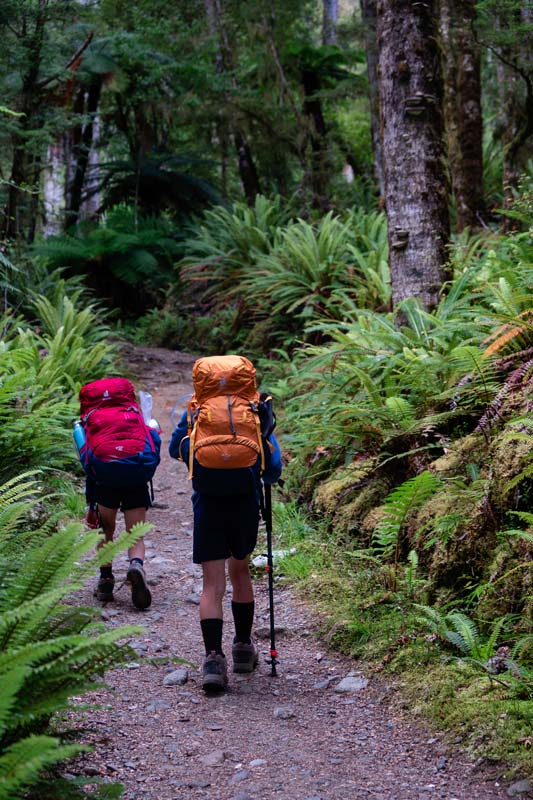
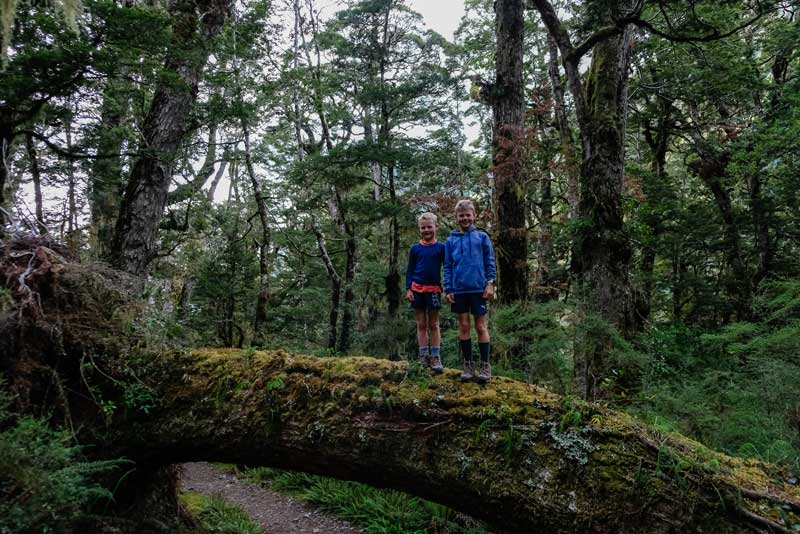
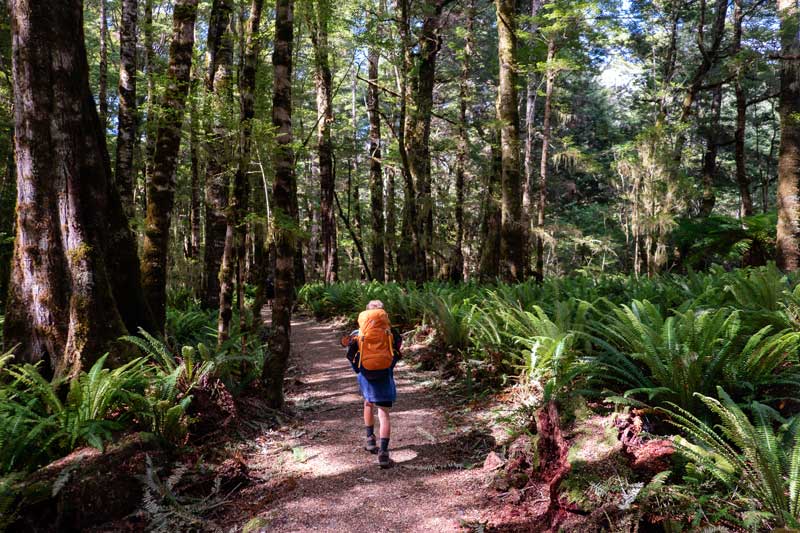
The first 5-6km is all flat trail. You walk through the electric green forest, full of huge ferns and lush plants. Seriously, greenness is an assault on the senses. It’s a great way to warm up and get your muscles raring before you hit the hill.
Just past Dock Bay (about 3km in) you will also see a Kiwi Guardian post, so take a photo of the code so the kids can receive their medal for walking on the trail.
At the 5-6km mark you will reach Brod Bay. It’s a beautiful bay directly across from the Te Anau township and your last toilet stop before you reach Luxmore Hut. There’s an undercover shelter here in case its raining so its another good reason to stop here too.
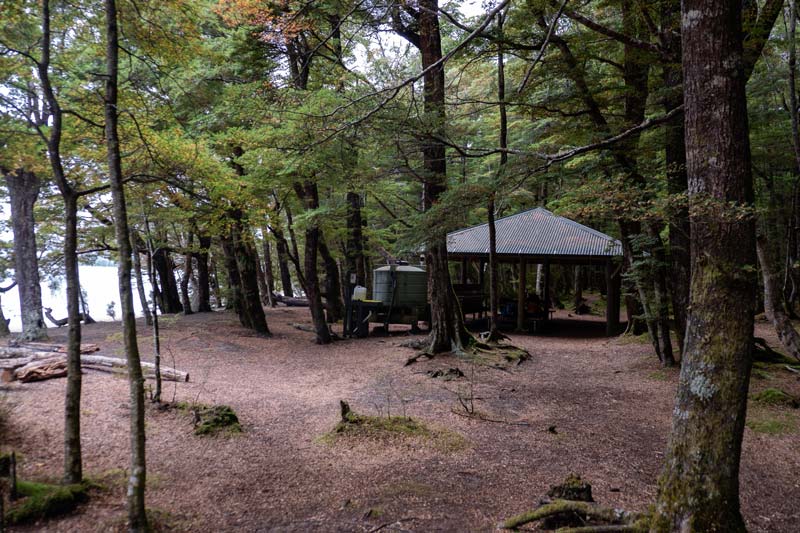
If you didn’t want to walk this first flat section, Fiordland Outdoors run a Kepler water taxi across from Te Anau (there’s a scheduled boat service) so you can actually start your Kepler hike here. But I liked the walk in. It was enough to get your muscles going and there was plenty of flat to do all those pack tweaks and adjustments too.
From Brod Bay campsite to Luxmore Hut you have a long moderate uphill section. If you are used to hiking up hills, the climb itself isn’t too strenuous and the trail is like compacted woodchip and gravel. In hiking terms, this trail is like State Highway 1. You don’t have to concentrate on your footing. Just get in there and get the work done.
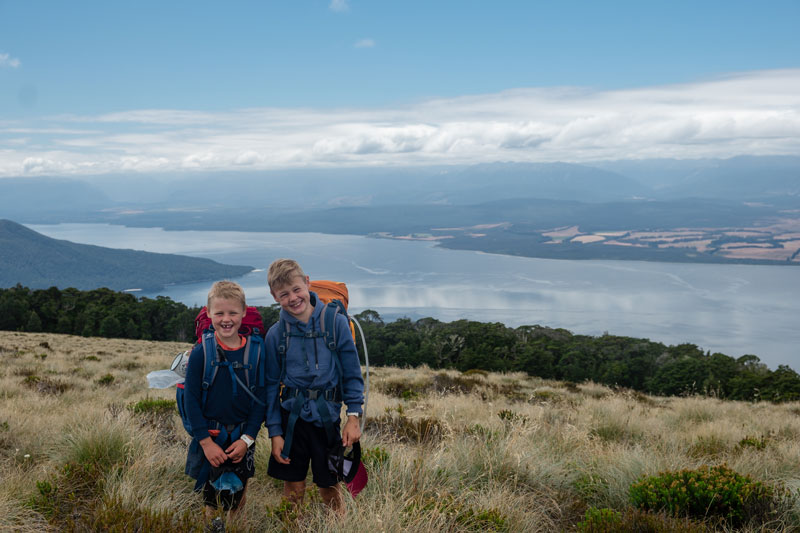
The uphill hike winds its way through the bush and is shaded most of the way. When you finally pop out of the bush, you’ll have a 30-40 minutes out in the open, with a gentle uphill towards Luxmore Hut.
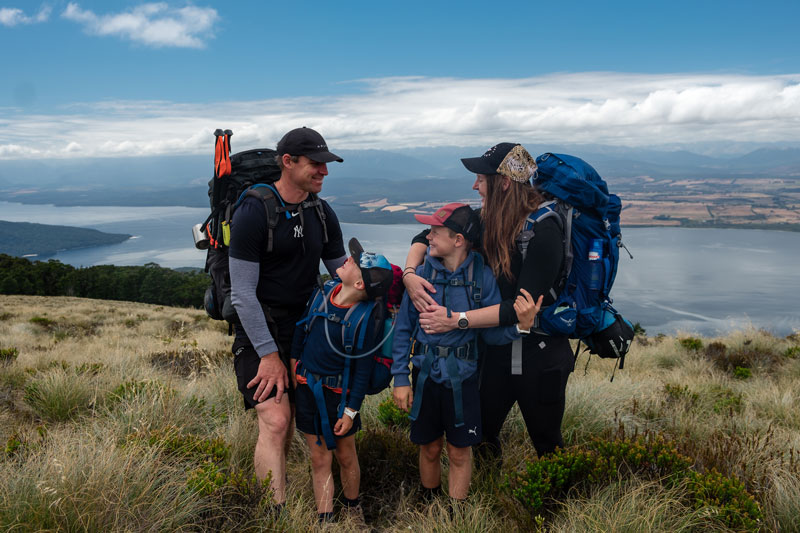
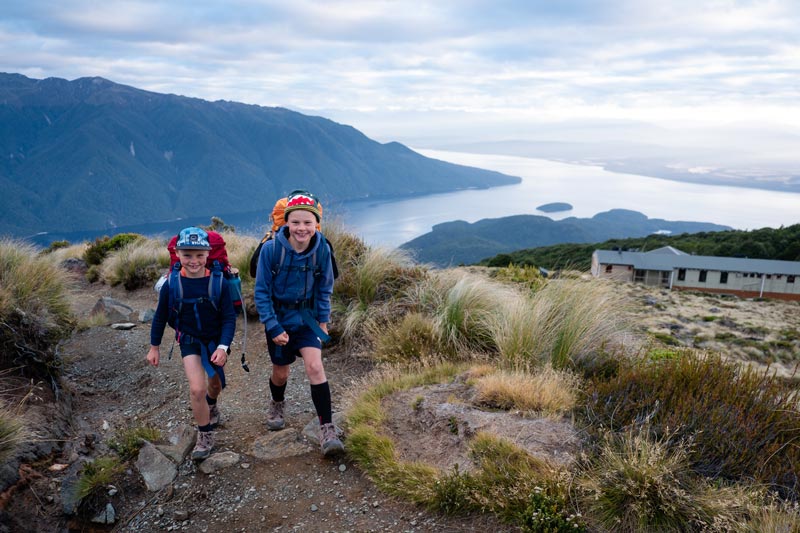
This section has the best views of the day, looking out over Lake Te Anau. We used this time to take some nice family photos and then strolled over towards the hut.
Luxmore Hut, Kepler Track
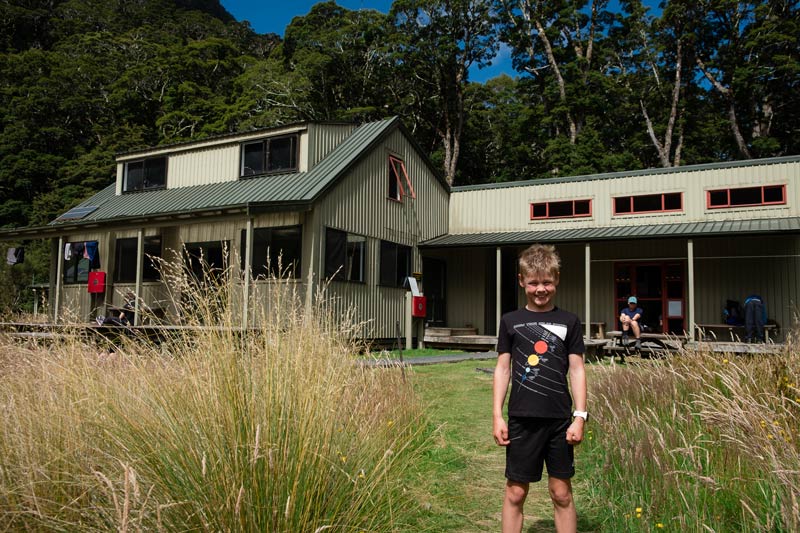
Luxmore Hut is a really nice backcountry hut. By the looks of it, it has been replaced in the last 10 years as its very open and has tons of space. Let me tell you what its like and give you some details if you haven’t been to a DOC hut before
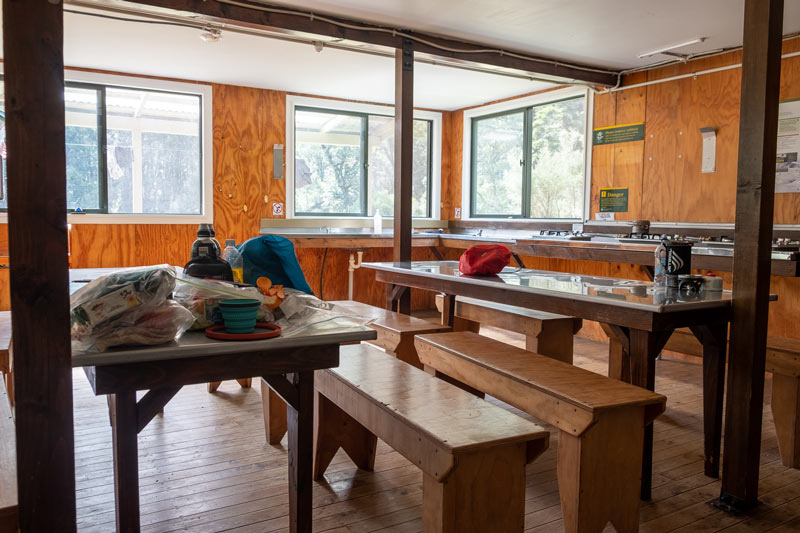
The main kitchen/living area: What’s provided
- Long wooden tables and benches
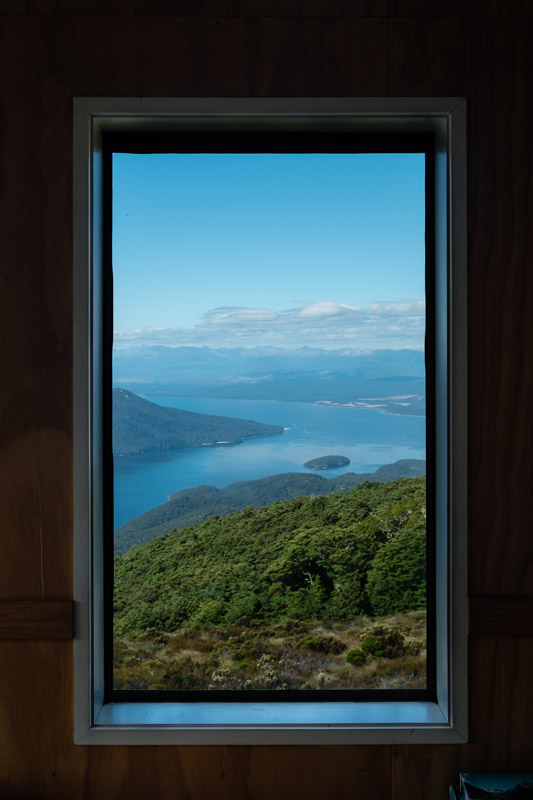
- Great views out the window over Lake Te Anau
- Multiple gas stoves. Gas is provided but you need your own pots and utensils
- Sinks with running cold water. Do boil or filter this
- Fire (definitely not required when we were here, it was over 20C)
- Boot racks for your tramping boots
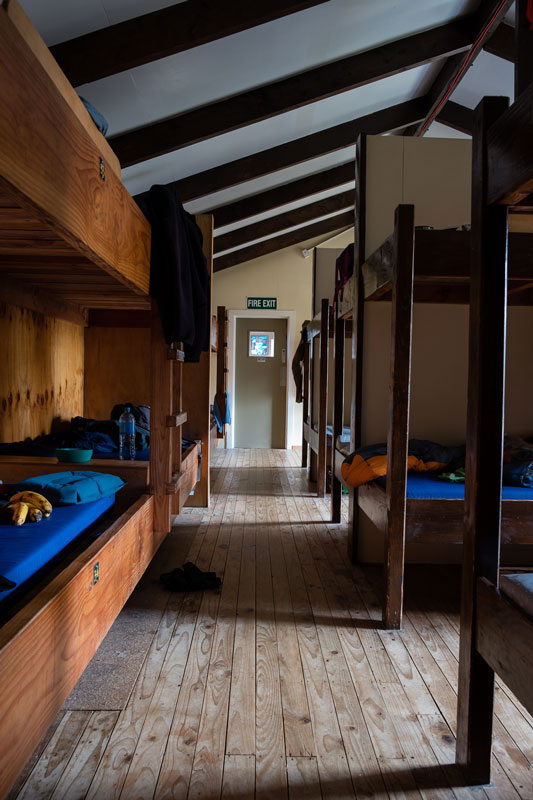
Upstairs there were two bunkrooms and a bathroom. These were shared bathrooms (no separate male and female toilets) and they have flushing toilets. This fact I find amazing so cherish this. You won’t find this at all backcountry huts in New Zealand.
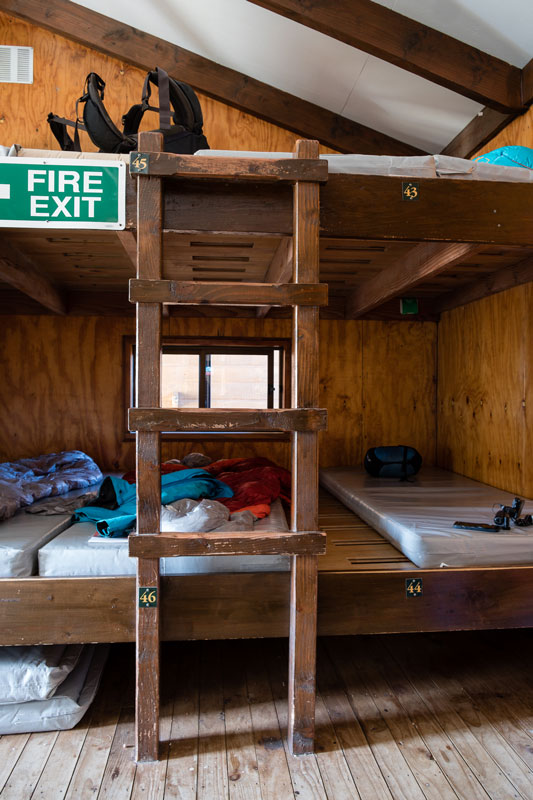
The bunkrooms had a mixture of single bunks where you weren’t sleeping next to anyone, and platform bunks which are one huge platform with mattresses all next to each other.
Tip: Bunks are not allocated so the earlier you arrive at the hut, the more choice you will have
Tip #2: Choose a bunk in the darkest spot and away from people if possible. When travelling with kids in the summer, there are no curtains on the windows, so this helps the kids get to sleep a little better. Or bring an eyemask.

Side Trip from Luxmore Hut: Luxmore Caves
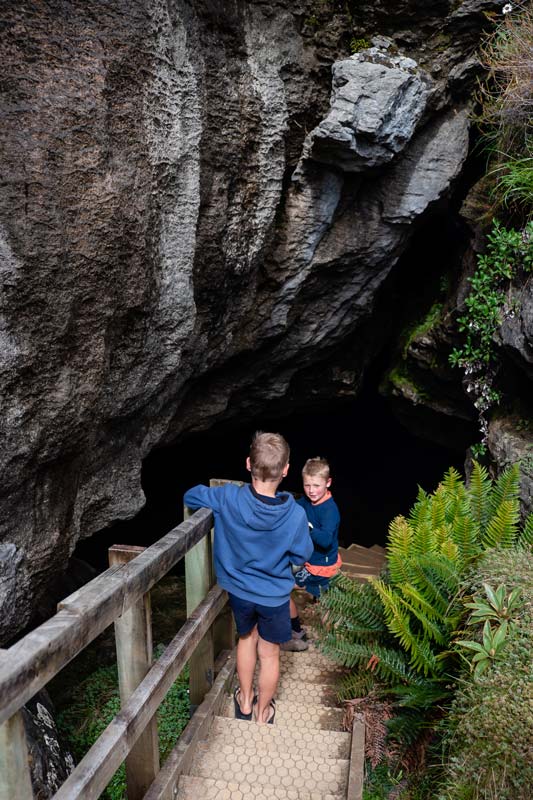
After a day of uphill walking, all you want is more walking right? Well the stroll to Luxmore Caves is only 10 minutes and once you’ve fuelled up and dropped your pack, it really is a good way to stretch the legs.
The Luxmore Cave system is quite cool. And literally is cool, it’s one thing you will notice heading inside. You will need to take a good head torch or light. A phone like is o-kay, but something stronger would be much better. You’ll need at least two light sources as if your battery did die for some reason, it’s deathly dark and you would struggle.
The Luxmore Caves actually go in quite deep if you don’t mind bending, squishing and contorting a little bit. Don’t forget to look up as the rock formations above you are really cool. I’m going to say its limestone, but don’t quote me on that. But definitely worth a look. We were there for about 10 minutes, so it was not strenuous at all.
Luxmore Hut Hike: Quick summary and FAQ’s
How long does it take to walk to Luxmore Hut?
About 5-6 hours
How much elevation gain is Luxmore Hut?
Luxmore Hut sits at 1085m above sea level. The altitude of Lake Te Anau is 210m, so the elevation gain for the Luxmore Hut climb is about 875m
Can I camp at Luxmore Hut?
No you can’t camp at Luxmore Hut as there is no DOC campsite here. The closest is at Brod Bay at the bottom of the hill, a few hours away. As the Kepler Trail is a New Zealand Great Walk, you must be 500m from the Great Walk Track to camp.
People who choose to camp in this area head far past Luxmore Caves and over this hill. 500m is quite a long way so you will need to go way off trail if you wish to do this. DOC wardens are known to check this area and if you’re too close, they will ask you to move on.
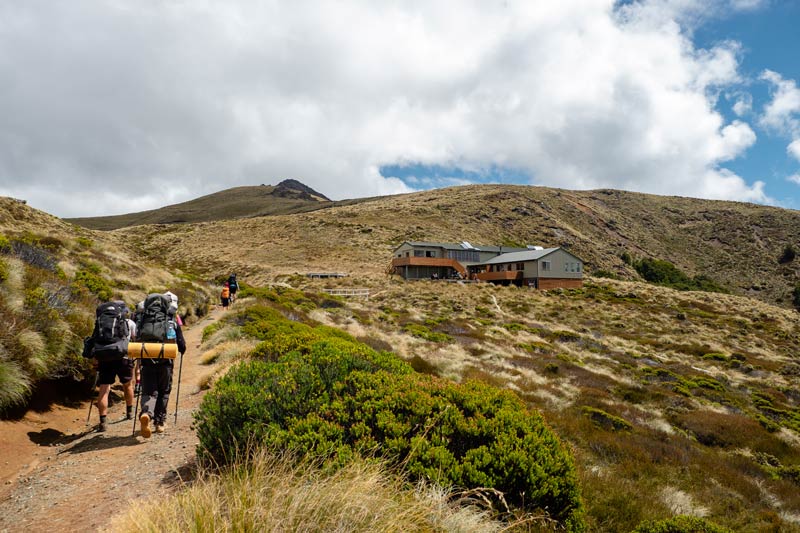
Day 2: Luxmore Hut to Iris Burn Hut: 14.6km
DOC suggested walk time: 5-6 hours
Backyard Travel Family walk time: 7 hours 40 minutes including a side trip to Mt Luxmore Summit, lunch, snack and photo stops. My garmin clocked 17.47km including the side trip.
The details
We started this day at 7am and arrived at 2:40pm. After completing the Routeburn Track, we learnt we started too late in the day. Even 8.30/9am with a longish walk meant we arrived at 4-5pm and that was just too late to relax, get dinner and get the kids to bed, so we made a conscious effort to get up at 6am on this trip and it was the best thing we did.
Our kids were the youngest on this trip and combined with my love of taking photos, it can mean we are a little slower. Also being on the trail in the early light, in the cool, having the track to yourself is just magical, so I highly recommend it.
So what is day 2 like?
EPIC!! It was my favourite day on the track, so get excited.
Start today with a climb up behind Luxmore Hut and don’t forget to turn around for the views! Starting straight up will feel a little strenuous to start as there is no warm up flat today but after not too long, it will flatten a bit and be a gentler incline.
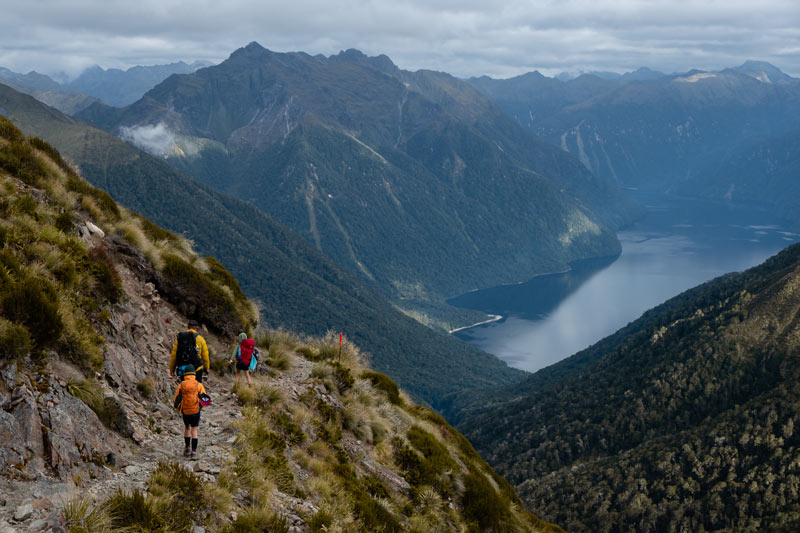
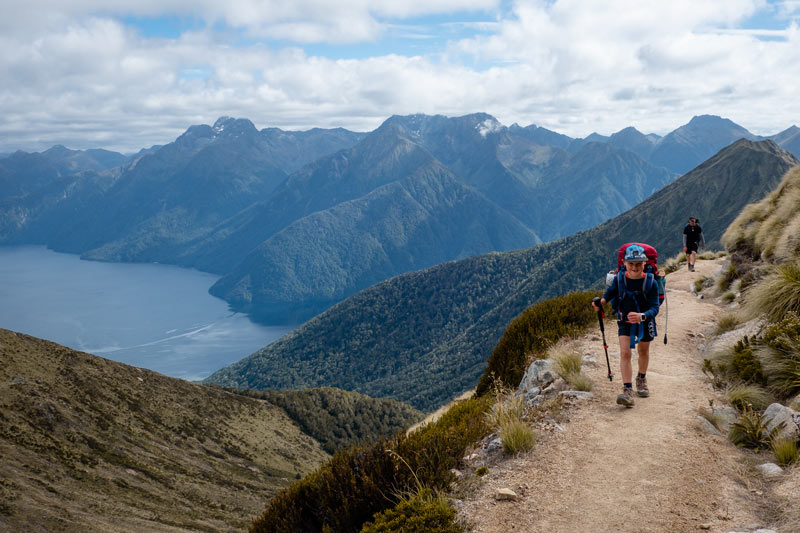
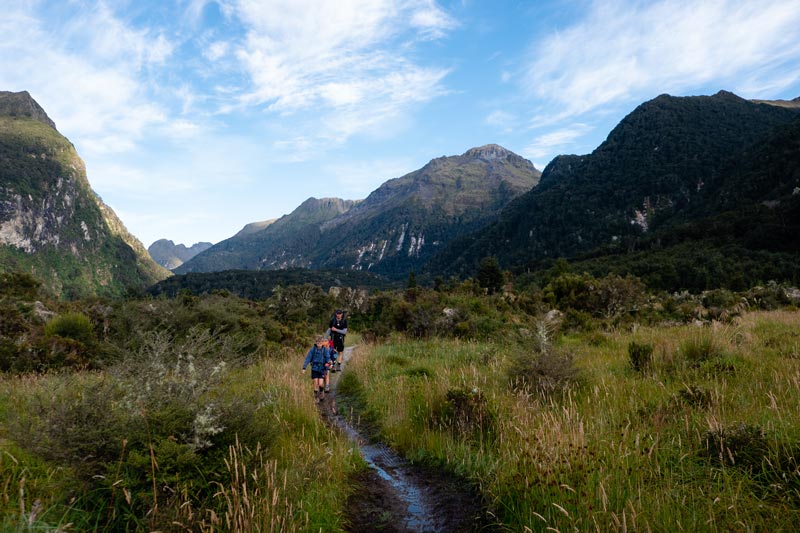
I really enjoyed this uphill. You had lake views and as you head deeper into Fiordland National Park, the mountain vistas were insane. I can only imagine what they would be like covered in snow. The mountain scenery is so dramatic and I just loved sidling along.
Side trip: Mt Luxmore Summit
Definitely head up to the Mount Luxmore Summit. It says 10 minutes but I feel like it took us a little longer than that, maybe 15 or so. Don’t leave your packs at the bottom of the keas will rip them apart, the cheeky things.
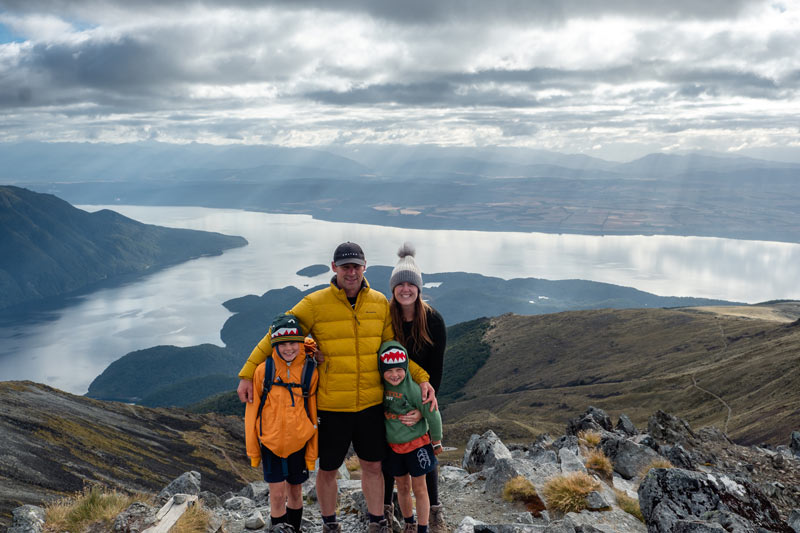
It’s a rocky little climb but you’ll get 360 degree views up here. It was crazy windy, so here compared to a breeze on the trail, so you may need a warm hat for this one, especially if its early in the morning. In terms of Kepler Track elevation, this is the highest point on the trail.
From here, enjoy the gentle – moderate uphill as you sidle the edge of the mountains. So much goodness here and I really enjoy the trail.
Stop 1: Forest Burn Shelter
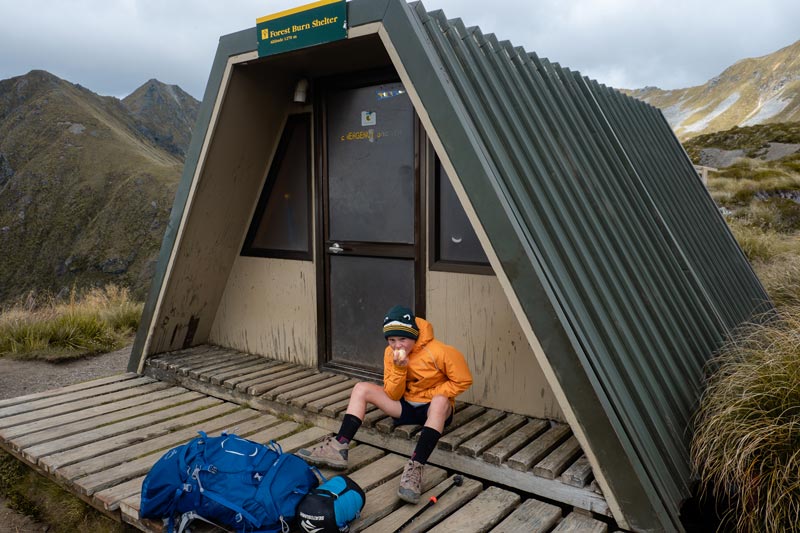
From Luxmore Hut to Forest Burn Shelter, it took us about 2.5 hours including our side trip to Mt Luxmore. We stopped here for some morning tea in the shelter and a toilet (never pass a toilet without using it team)
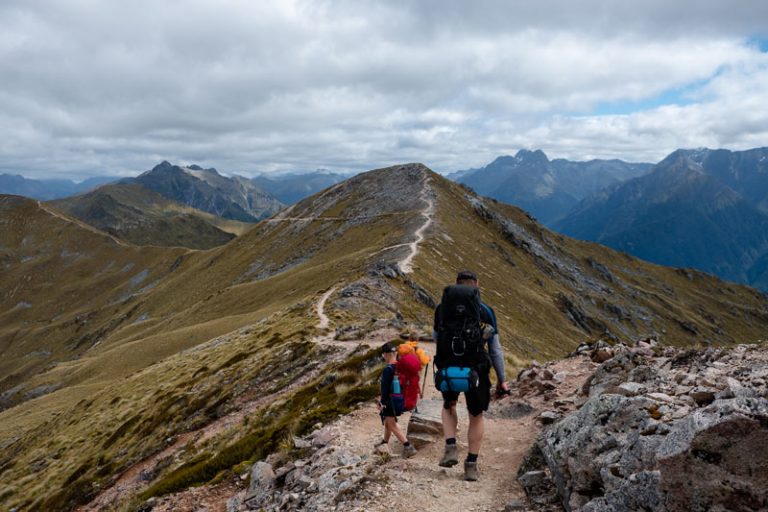
And one we continued. More up and across and you will finally get to those big ridgelines that you see on all the Kepler brochures. I love walking along the ridges of mountains. There’s just something about it and it was probably this that made me want to do this New Zealand hike in particular.
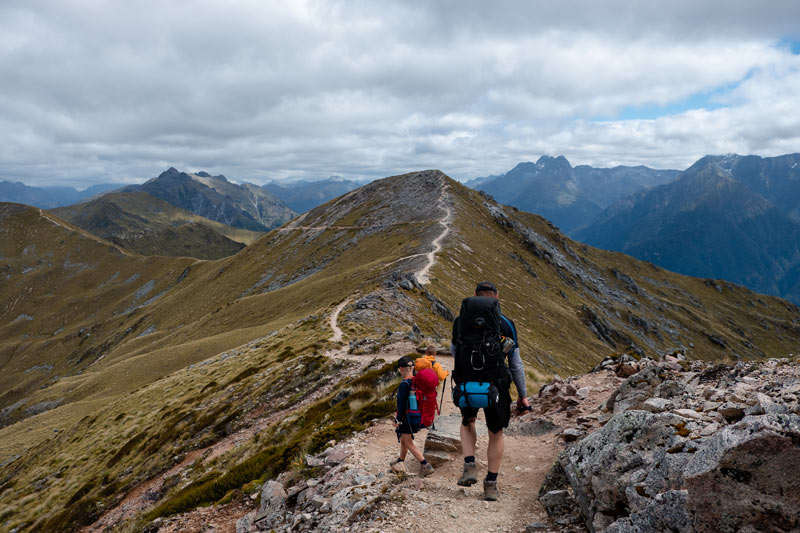
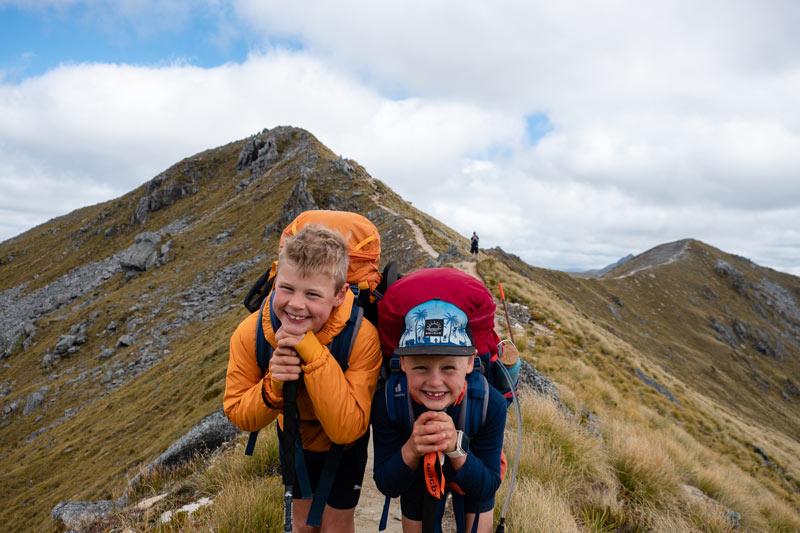
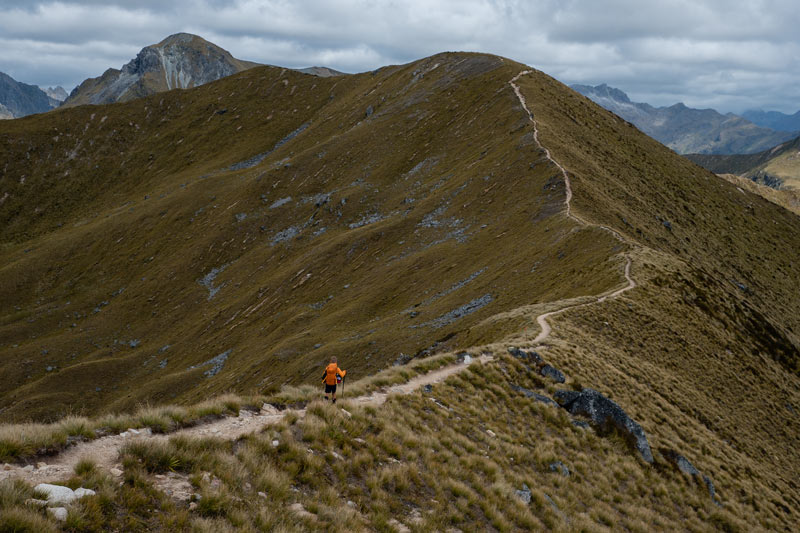
Take the photo, take the video, do all those good things because it’s beautiful and makes you feel so alive!
From this ridgeline, you won’t be able to see the next shelter but it is directly across from you, before it heads downhill. Maybe 20-30 mins ish, I can’t quite remember, but lunch is in sight.
Stop 2: Hanging Valley Shelter
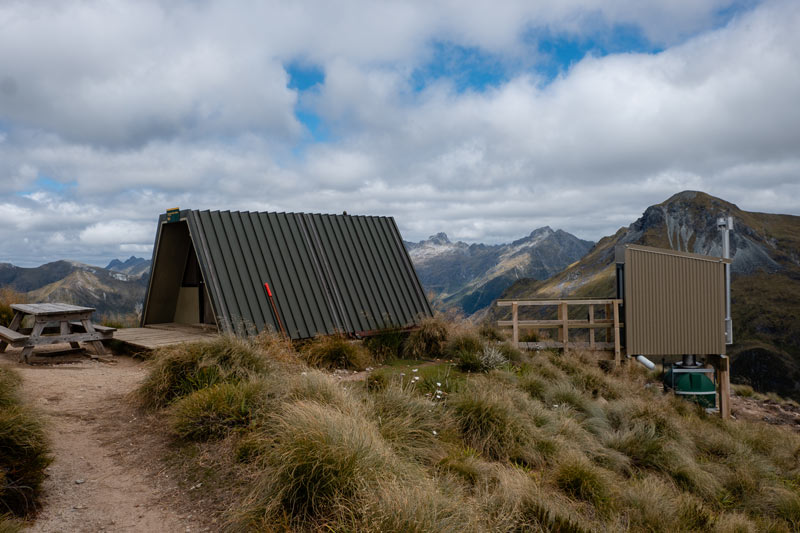
The sign at the last shelter said it was a 2 hour walk to Hanging Valley Shelter and we did it just short of this, again with a few snack and photo stops along the way.
These little A Frame shelters are not designed to sleep or camp in, however if the weather was horrendous and you couldn’t go on, then it would be a safe place to stay. I can imagine, with Fiordland’s 200 or so days of rain per year, that the shelters would be very welcome lunch stops if the trail was rainy and windy.
I have a love-hate relationship with this last section of track.
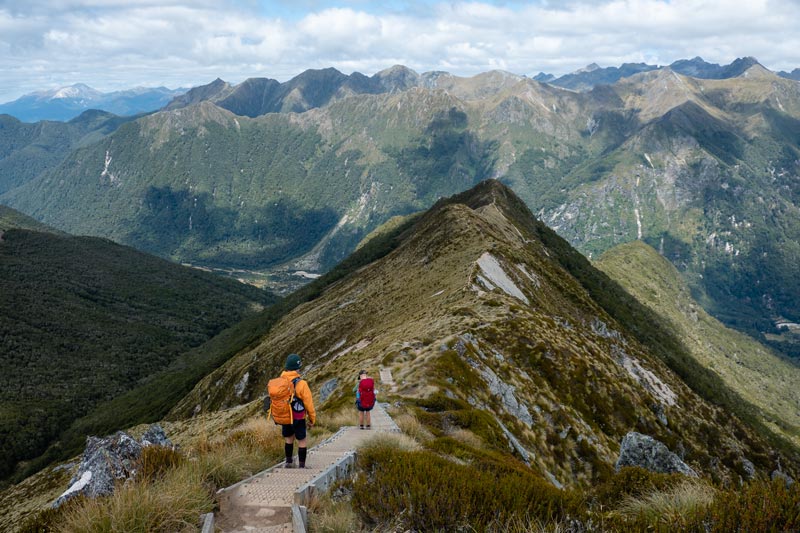
Heading down the trail and stairs from the shelter is beautiful, but the downhill section was a killer. Its about 20-30 minutes to the downhill section and while the sign says 1 hour 30 minutes to the hut, practically everyone seemed to say it took them 2 hours, us included.
There are almost 100 switchbacks (zig zags) heading down this trail to the hut at the bottom, and just when you think they’ve stopped as there’s a lovely section of river here, the view opens and you are only part way down.
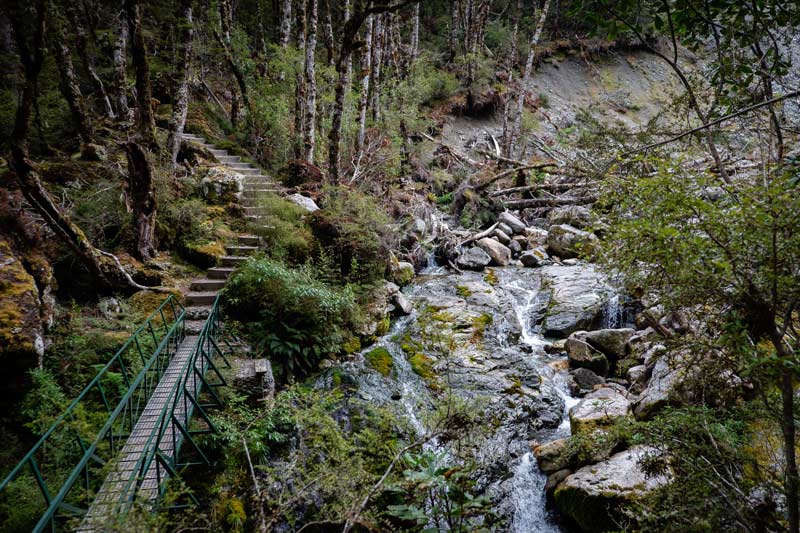
Tip: Save your good treats for this section as it’s relentless. We fueled up the kids lots here as it took a ton of concentration. It wasn’t too rocky underfoot, but after a good amount of hours walking already, this was the section that gave everyone sore feet.
I would bring poles for this section if you have any issues with your knees or generally don’t enjoy the downhill.
Iris Burn Hut
The relief when you finally make it here – woohoo!
Bunk Room tips: Families listen up
When you get to Iris Burn Hut, nab your bunk early if you can. There’s a big bunk room that almost has some “private” bunks that are hidden in the corner. It meant 3 of us could sleep down the bottom without anyone walking past us and it was also quite dark.
It was cooler on the bottom and there was a small window open that made this our most comfortable night sleep. It was great!
The main living area of Iris Burn was much smaller than Luxmore Hut. Everyone had to cosy up and share more seating here and I’m going to say there wasn’t quite enough table space at dinner time, but a few groups eating off their knees.
Facilities at Iris Burn Hut
- Gas cookers with gas provided (own pots necessary)
- Solar lighting between 7-9pm ish and from about 630am
- Wooden benches and tables
- Flushing toilets, mirror, hand basins
- Bunkrooms with shared bunks
What to do at Iris Burn Hut
- Side trip to the waterfall. It’s about a 20 minute walk to a lovely walk. The trail is flat and if you’re game enough, bring your togs for a swim. A great cold water plunge but I’ll be surprised if you last very long
- Stroll to the river: Just a few minutes from the hut you’ll find the river where you can also have a dip.
Day 3: Iris Burn Hut to Moturau Hut: 16.2km
DOC recommended walking time: 5-6 hours
Backyard Travel Family Actual Walk time: 5.5 hours (not as many stops today for photos and only a short lunch stop. My garmin recorded 17.82km
Today was the day that I was dreading to be honest. All in the bush, flat with a few small ups and downs, but it wasn’t actually too bad.
Today we just put the motor down and went for it as it was longest walk distance. The bush was beautiful and there were a few small hills but none more than about 5 or so switchbacks. You know as you climb and you’re like… hmm.. How many more of these are there? Then you’re at the top. So it’s quite good.
So I’m going to call this day flat with some undulations
Along the way there aren’t as many photo stops so just enjoy the forest, listen to the birds and make your way to Moturau Hut
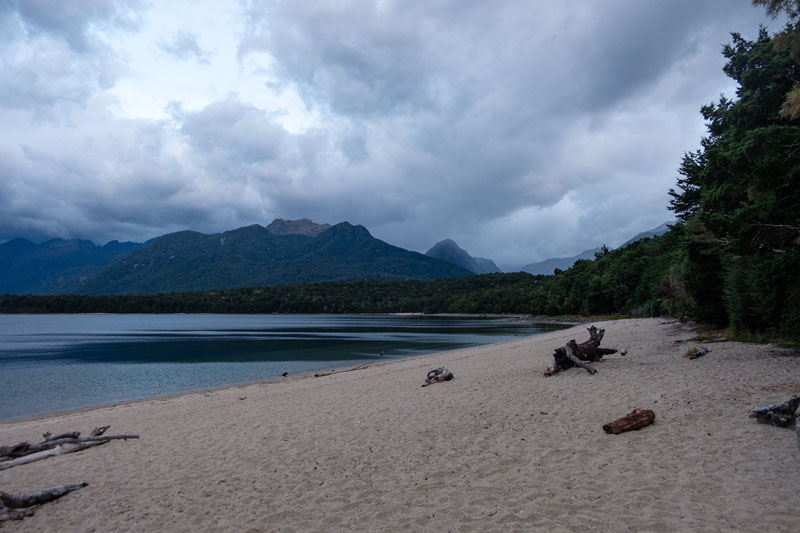
Moturau Hut
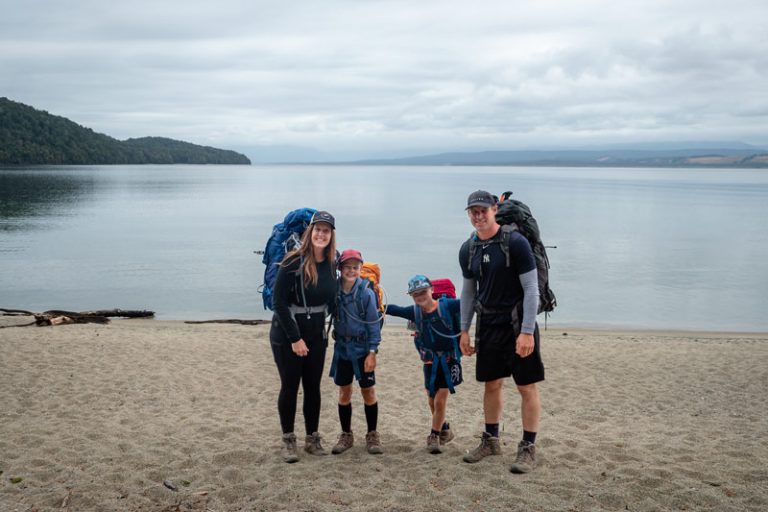
Right on Lake Manapouri, it’s the perfect time for a swim. I’d say almost everyone had a dip of some sort and it will be warmer than last night’s river or waterfall, I tell you that.
The kids went under the water and had a whale of a time, until they shivered and dried off. Most people spent about 5-10 minutes in the water so it is worth bringing some sort of towel and something to swim in.
We arrived here about 12.30pm so had all afternoon to just relax
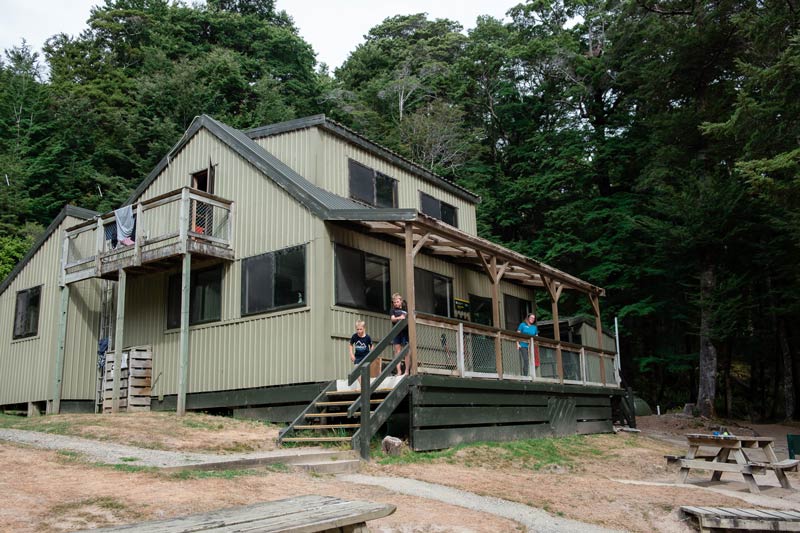
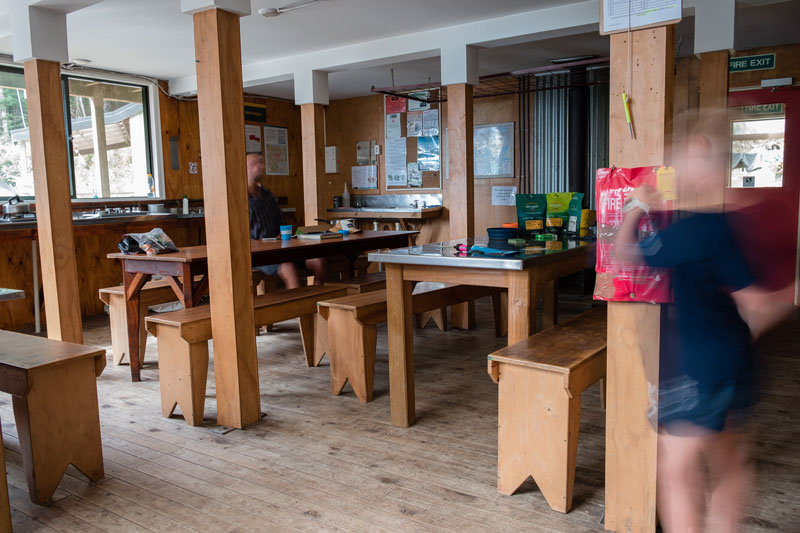
What is Moturau Hut like?
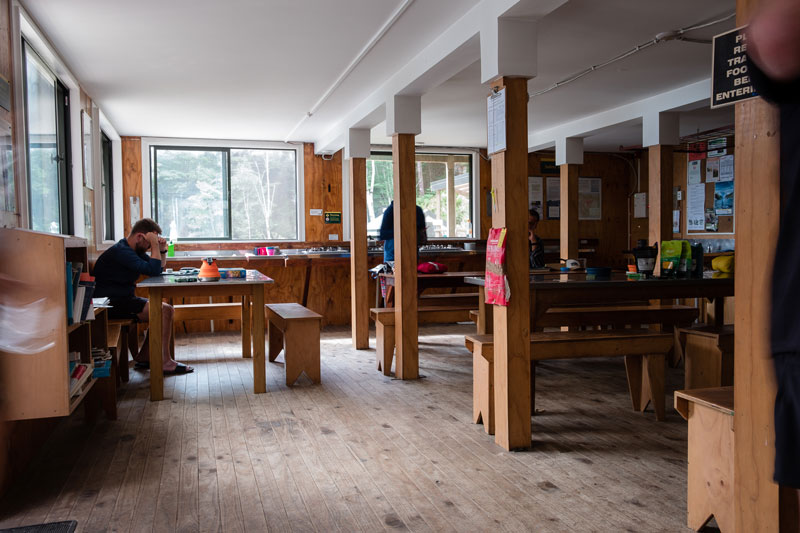
- It’s a two storey hut with a big bunk room up above and a smaller one downstairs (it got really hot from a warm day and all the bodies in it. I think this ended up being our worst night sleep)
- Flushing toilets, basin and mirror
- Kitchen area: same deal – gas cookers with gas, tables and chairs
- A number of nature books if you’re interested in birds and plants with sections highlighted to show what you might find.
- Outside picnic tables
- Did I mention the lake?
Day 4: Moturau Hut to Kepler Carpark at the Control Gates: 15.5km (or stop at Rainbow Reach)
DOC recommended walking time: 4-5 hours 30 mins.
Backyard Travel Family timing: Today took us 5 hours, 30 minutes with not a lot of stopping for breaks as it was pouring with rain. My garmin said 17.82km today.
Okay, day 4 – last day! Woop woop. You have made it, almost.
Now I thought this walk out was completely flat, but its kind of similar to the day before. No massive hills so in theory its mostly flat, but there are lots of ups and downs. Nothing that will kill you, but if you were hoping for flat as a pancake, there was definitely more little undulations that I thought.
Not difficult but by this time I think most have their eye on the prize – the finish!
Now you won’t get many photos from me today as about 30 minutes after we left it poured with rain, so it was camera away and crack into the 16km leg to go.
Now 16 km is quite a long way, so if you don’t want to do this, you can bail out at Rainbow Reach. There is a carpark here where you can get a shuttle, or if you’re going with a group, some park here and some at the Control Gates and do a bit of your own shuttling between you.
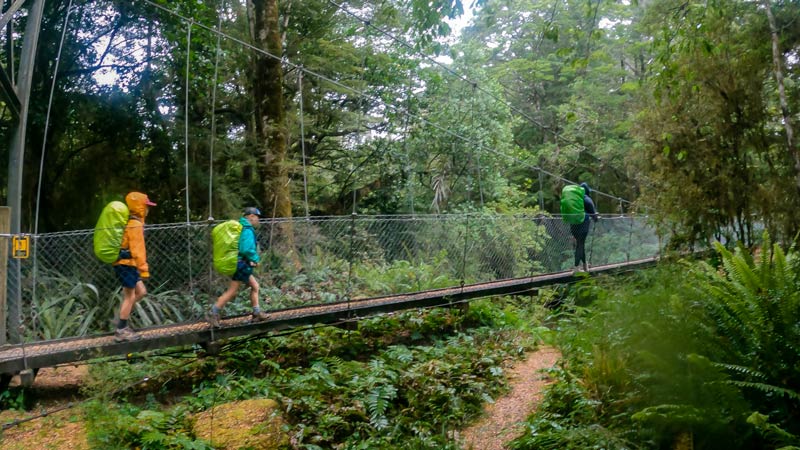
If you choose to finish at Rainbow Reach, its only a 90 minute walk, about 6km for you until the end of your Great Walk
But can you say you walked the whole Kepler Great Walk if you bail early?… well… thats up to you. My kids wanted to say they had walked the whole 60 odd km track, so I’m really proud of them for sticking it out.
That’s not to say at that 6km mark in the pouring rain that we didn’t kind of wish we were done. But thats totally up to you.
But enjoy the lovely bush today and the sign posts about the Wetlands. The kids found those quite interesting for sure.
But after 16km, you’ve made it!! Well Done! You have completed the Kepler Track
What to eat on the Kepler Track
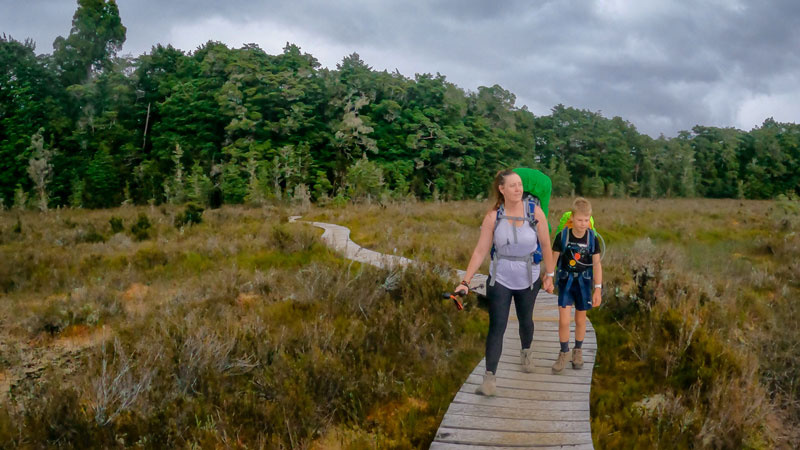
Choosing a menu for the Kepler Track was perhaps the hardest part of the planning process. Making sure you carry enough, but not too much. Having extras for just in case, but not just taking extra weight. Trying to carry light food, but also food that everyone will eat.
Need ideas for tramping food: Read our Hiking Food Ideas Guide
Are you tired already?
One thing we learnt from doing the Routeburn Track the previous meal was to eat fresh food for as long as you can, before diving into dehydrated meals. The kids got over the dehy very early in the piece and really wanted “real food.”
I’ll show you our menu below which might not be the lightest, but I think we had a good mix of heavy and light foods. The good thing was that everyone ate so well on this trip and we didn’t hit a wall with the kids at all. No grumpiness either which was a bonus
Tips for packing food
- Get rid of any bulky packaging. We used Compostic snap lock bags which were light and easy to fold
- If you don’t need all the food, take it out. Only take what you need
- Bring some sort of rubbish bag. We have a drawstring bag like a child would use for swimming for all our rubbish so it didn’t get mess anywhere.
Menu for 2 adults and 2 kids for the Kepler Track
Day 1:
Morning Tea: 4 x muffins, 4 x bananas (before they have a chance to get squished)
Lunch: One loaf of bread, ham, ⅓ block of edam cheese, 1 capsicum, ½ cucumber, handful of cherry tomatoes
Afternoon tea: Scroggin
Dinner: 2 packets of Pams ravioli
Dessert: ½ pack of dark chocolate wheatens and 20 marshmallows
Comments: Could have done with a bit extra with dinner. Maybe another pack of pasta and a side dish
Day 2:
Breakfast: Muesli/Weetbix and UHT milk (cereal all portioned out)
Morning Tea: Oranges x 4 and Muesli Bar x 4
Lunch: 1 large homemade Bacon and Egg Pie and Apple x 4
Afternoon Tea: Homemade Cookies x 4, few lollies walking down the hill
Dinner: Teriyaki Chicken Rice Bowls: 2 cans of Chop Chop Teriyaki Chicken, 3 x bags of boil in bag rice, ¼ cabbage, 3 carrots
Dessert: 2 x Back Country Cuisine Chocolate Brownie Pudding
Comments: You could take milk powder to make up which would have been far lighter but our kids don’t like it. But we drank it the first day.
Day 3:
Breakfast: 3 x single Back Country Porridge and ½ pack of Back Country Eggs
Morning Tea: OSM kids bars and adult nutrition bites and scroggin
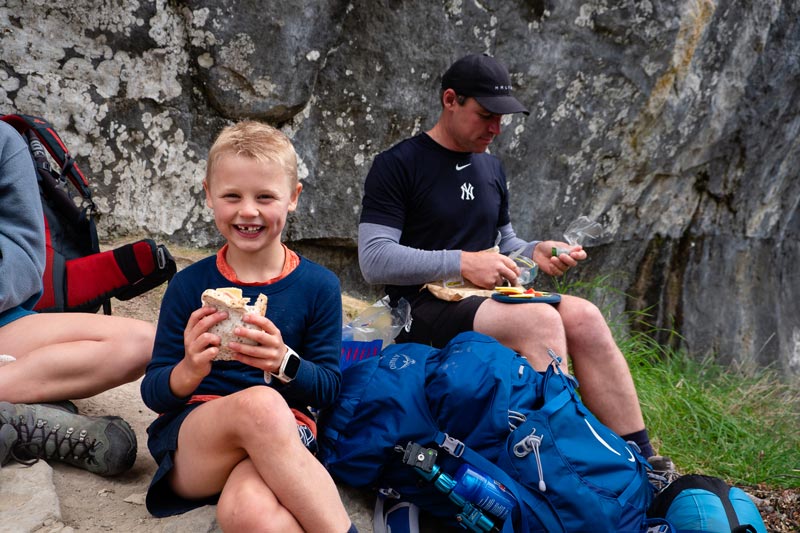
Lunch: Crackers, cheese, salami, homemade cookies x 4
Afternoon Tea: BBQ nuts pack, shared a Back Country Chicken Tikka Masala (spare) Homemade cookies, apple
Dinner: Back Country Meals x 3 (We shared these regular 2 serve meals including Creamy Carbonara, Butter Chicken and Beef and Pasta Hotpot)
Dessert: 2 x Back Country Cuisine Apple Pie
Comments: Big afternoon tea as we arrived at 12.30pm that day so had lots of relax time to kill, and eat apparently
Day 4:
Breakfast: 2 x Back Country Cooked Breakfast
Morning Tea: All the bits left over: scroggin, muesli bars x 4, cookies x 4, part packet of crackers
Lunch: Pics Peanut Butter Slugs and a 6 pack of pita bread
We finished at 1230pm and grabbed the rest of our lunch out in town.
What to pack on the Kepler Track: Kepler Track packing list
Even though the Kepler Track Great Walk season is in late spring, summer and early autumn, ie. the warmest times, you must still bring clothing for all seasons. On day 2 in particular you are in an alpine environment around 1000-1400m above sea level and the weather can be horrendous.
Even on a summers morning, it was about 10C and we had to drag out the jackets and warm hats, so please don’t think that because its summer time, you won’t need any warm gear. Alpine weather can change so quickly and if you’re familiar with New Zealand weather at all, its 4 seasons it one day.
The Kids Packs
If you want more info on the brands and what gear to pack, try our: Hiking Packing List and Recommendations article
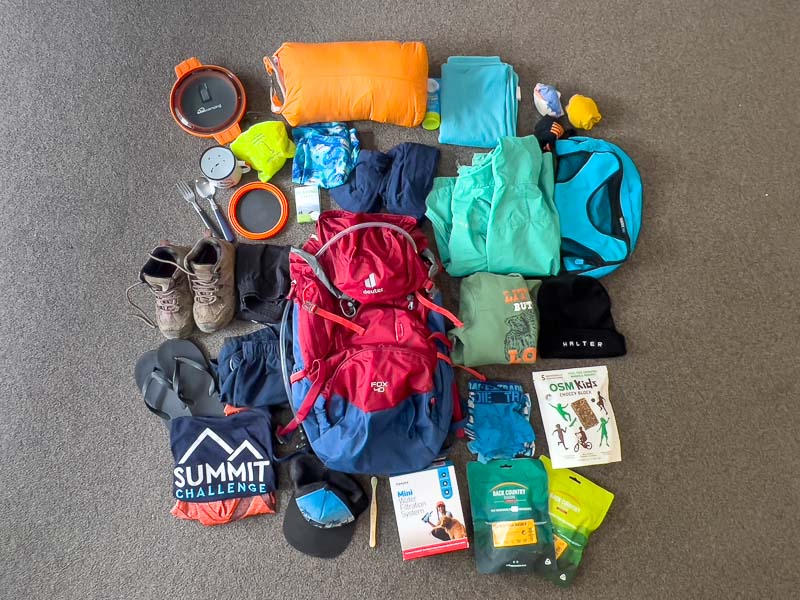
The kids carried exactly the same things in their backpacks. Nathan (9) has a Deuter Fox 30L Backpack and Kipton (7) has the same in the 40L. Yes the youngest has a bigger bag, but wanted to have a larger option for down the track and we didn’t have to fill it all.
This is what they carried in their pack
- 1.5L water bladder filled with water (about 1.5kg)
- Adult down sleeping bag (just less than 1kg)
- Packing cube
- Hut clothes: extra t-shirt, shorts, 3 x underwear, 3 x socks
- Hiking clothes: t-shirt, shorts
- Polypropylene long sleeve top and leggings
- Therm Waterproof jacket
- Warm sweatshirt
- Beanie
- Cap
- Northside Hiking Boots
- Muesli bars, snacks for the day
- Collapsible bowl
- Fork and spoon
- Waterproof pack cover
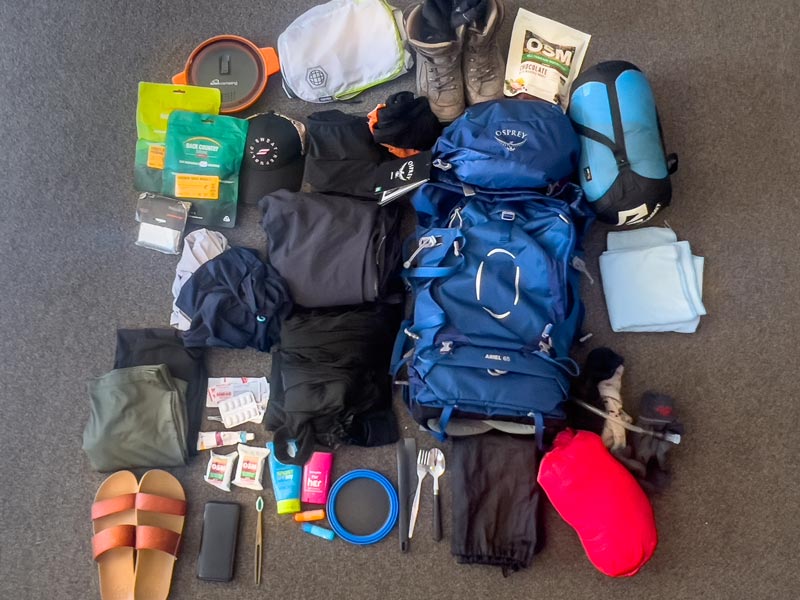
Jens packing list
- Osprey 65L Hiking Pack
- Sea to Summit Sleeping Bag
- Tramping clothes: Leggings, singlet, long sleeve polypropylene top
- Extra set of hiking clothes: leggings, tshirt
- Hut clothes: A loose dress that I slept in too (to each their own here)
- Hut shoes: slides (means you can wear socks too if there are bugs, and there are)
- Underwear: Icebreaker socks and knickers x 3 each. Merino is the best, doesn’t smell and dries well from sweat.
- Togs
- Light towel
- Cap
- Warm layers: Vigilante long sleeve top and leggings
- Macpac Puffer Jacket
- Macpac Copland Rainjacket
- Beanie
- First aid: plasters, blister plasters, insect repellant, cream for insect bites, panadol, ibuprofen
- Chafing cream
- Foldable shovel (for off grid toilet needs)
- Toilet paper
- Sunscreen
- Tech: Power bank x 2 and cords, camera, lenses, dry bag for this gear.
Gear List: carried between my husband and I. These are shared items for the group
- Food (see the menu)
- Collapsible bowls
- Fork, spoon, knife
- Sharp serrated knife (fruit, cheese etc)
- Kiwi Camping collapsible pot
- Jetboil
- Sawyer Mini Water Filter (much easier and faster than boiling water)
- Drawstring rubbish bag
If you are visiting Te Anau and the Fiordland region some more, you might find these resources useful
- Te Anau Walks
- The best things to do in Te Anau
- Milford Sound vs Doubtful Sound (which boat cruise is better)
- The stunning Lake Marian hike
- Kiwi Burn Hut near the Mavora Lakes

Jennifer
Founder of Backyard Travel Family
Jen is a super organiser when it comes to travel. Having travelled extensively in Europe and Africa, has lived in London and the USA and holidayed in many parts of Asia, she is not a newbie to the travel space
Jen has three young children, 9 and under and travels around New Zealand with them.


